The challenges
Enterprise application integration needs to be fast and fault-tolerance. As a result, when it comes to integration with Maximo, we almost always opt for asynchronous, near real-time message delivery. This method of delivery has certain challenges which is not a big problem when using an external enterprise integration tool. There are dozens of these tools available on the market.
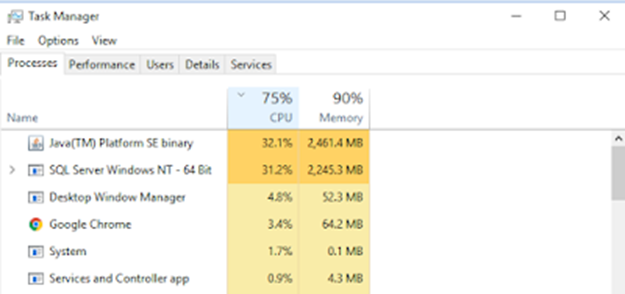
However, running an enterprise application integration system is expensive. Many smaller companies often opt for direct integration. Maximo Integration Framework offers an arsenal of tools to handle all kind of requirement. Yet, the framework is still lacking in two major areas:
- Data mapping
- Dynamic delivery
Previously, I have provided an example on how to use XSLT. In this article, I will discuss on how to address the dynamic delivery requirement.

When is dynamic delivery required?
In many cases, we need to build an integration interface with one or more of the following requirements:
- Different URL for each Add/Update/Delete action: this is a common pattern for the REST API nowadays. For example, the ServiceNow API has 3 different URL formats to Add, Update, and Cancel a Service Order.
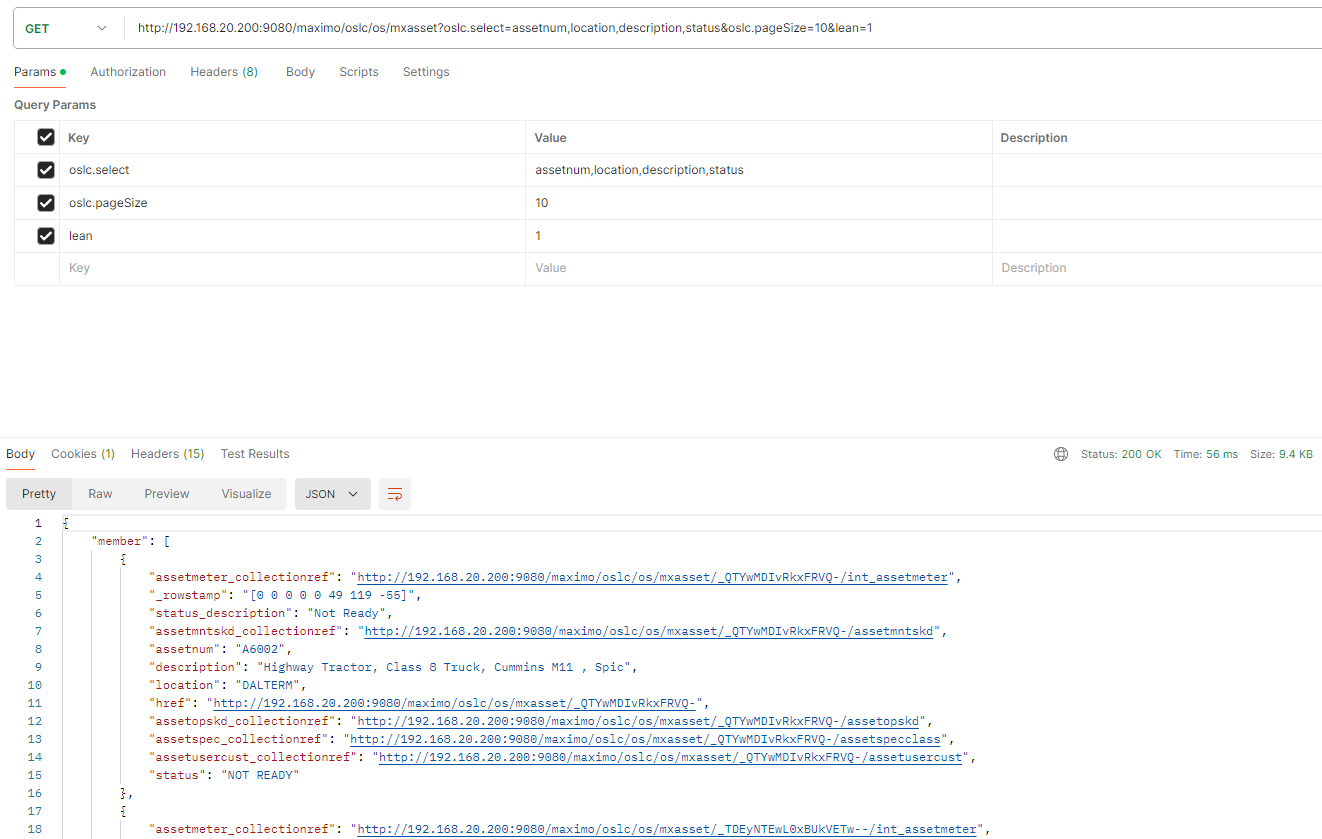
- The target application needs an Internal ID for the Update request: this is also a common pattern. The Maximo OSLC REST API itself is an example.
- The need for retrying and reprocessing failed deliveries: message delivery is expected to fail due to many external factors. Thus, this is a mandatory requirement for almost all integration interfaces.
In general, the logic to address the above requirement should be handled during delivery, not during publishing and transformation of the integration message.
Why using this approach?
When the external system requires an Internal ID for the Update action, one common strategy is to store the ID in the EXTERNALREFID field. For example, when a new PO is created, it is published to an external ERP system. Upon successful delivery, the receiving system responds with the Internal ID of the newly created record. We can store this value in the PO’s EXTERNALREFID field or a custom field. The next time when the PO needs to be published, if this field has a value, we know that the PO has already been created in ERP and thus, will send an Update request instead of a Create New request.
But this strategy often does not work well with asynchronous integration. For example, if the first request to create a new PO takes a while to process due to the external system being busy, a subsequent update to the PO will send another Create New PO request, resulting in duplicated POs in the target system.
However, if we handle the logic to determine whether to send a Create New or Update during delivery, this should not be an issue. In the case the first request failed, and the second request will be determined as a Create New. In the case both messages failed, and later they are reprocessed successfully, the first one that reaches ERP will be determined as a Create New, and the second one will be delivered as an Update.
Two key benefits of this approach are:
- No need for manual intervention
- Can use continuous outbound queue instead of sequential queue
Real-world Implementation
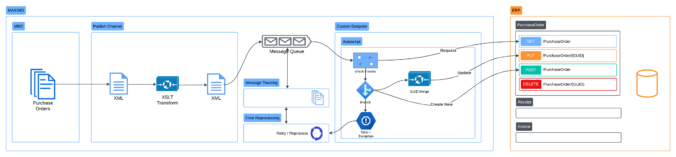
Over the last 2-3 years, I have built a few interfaces using this approach. So far, they have been working well. The latest one was an interface between Maximo and Myob Greentree ERP. In this case, Maximo handles the procurement process and Greentree handles the payable process. The functionality of Greentree API is somewhat limited. It does not support Sync operation and requires Internal ID for both the PO and the POLINE records. To address this requirement, the interface is implemented with the following key points:
- Data mapping is handled by XSLT
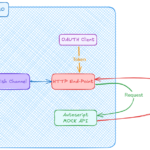
- Delivery is handled by an automation script endpoint:
- On delivery, the endpoint will query Greentree to identify the Internal ID and status of the PO and PO Lines. If the PO already exists, it will determine to Update or Add New PO lines depending on the status of each line.
- The original payload is manipulated during delivery to match with the current status of the PO in Greentree. Which means if it fails, the delivery will retry and come-up with a new payload to match with the new status of the record in Greentree at that point of time.
- An autoscript crontask is added to send error alerts to the user in Excel format. But it will only send email in the case there is a least one error. The email is delivered directly to the user most of the errors come from missing or incorrect GL Account.
Automation Script example
To implement the requirement above, we can create a custom endpoint with automation script. The endpoint can be associated with the publish channel and external system like other standard endpoints. That means the interface is fully compatible with other MIF functionalities including:
- Message Queues
- Message Tracking
- Message Reprocessing
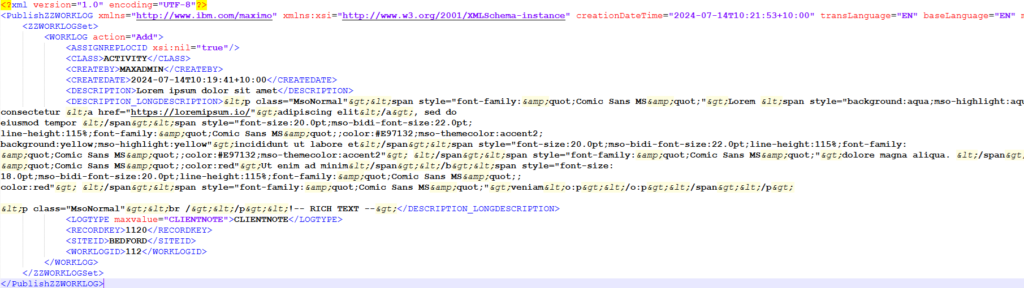
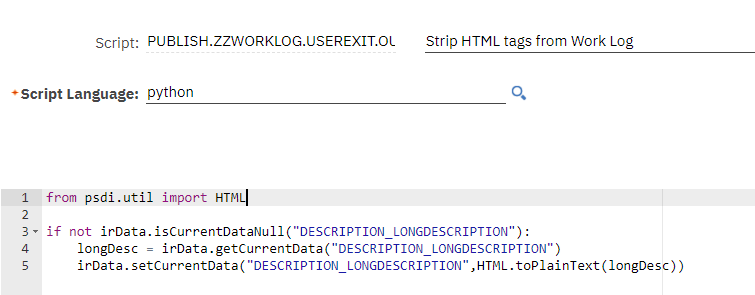
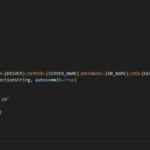
Below is an example piece of python code for the end point:
The basic example above does a similar job like a standard HTTP endpoint:
- The published message is passed to the script in the implicit variable requestData
- Any failure/exception at any line of the code will be equal to a failed delivery:
- The message is put back to the error queue .
- Error is captured and can be seen in the Message Reprocessing application.
However, by doing this, we have full control of what we want to happen during delivery such as:
- Query external system to determine if a record already exists, and if yes, get the Internal ID
- Raise an Exception to tell Maximo that the delivery has failed. This can be quite handy in given scenarios such as when an external system rejects a message but it still responses with a HTTP 200 code, and only provides an error message inside the XML response body.
Below is an example piece of code which does the following:
- Query an external system to identify if a PO record exists
- If the record exists, update the XML payload with Internal ID before delivering it to the system as an Update request instead of a Create.