While the JSON API in newer version of Maximo is quite useful, for many integration scenarios, I still prefer to use the old API infrastructure with Publish Channel and Web Service. However, the native format for this feature is XML.
To send or receive JSON with Publish Channel or Enterprise Service, we can translate the default to JSON format before it goes out / into the system. Below is a simple example to set it up.
Setup standard Publish Channel to send XML message
Create a new Publish Channel:
Name: ZZSR
Object Structure: MXSR
Create a new Enterprise Service:
Name: ZZSR
Object Structure: MXSR
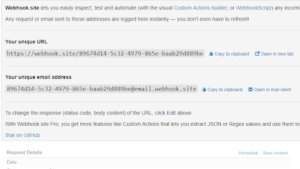
Create a new HTTP End Point: ZZWEBHOOK (To keep it simple, we use webhook.site. See more details here)
Create a new External System:
Name: ZZTEST
End Point: ZZWEBHOOK
Set standard queues.
In Publish Channels tab, add the ZZSR channel created above.
Enable the channel, enable the external system, and enable event listener on the channel
To test and verify our Publish channel is working:
Create a new Service Request, then save.
After less than a minute, Webhook should show a new message received in XML format
To send JSON instead of XML:
Update publish channel ZZSR, set Processing Class with value com.ibm.tivoli.maximo.fdmbo.JSONMapperExit
Go to the JSON Mapping application, create a new mapping:
Name: ZZTEST.ZZSR.OUT (it must follow this exact format <ExtSys>.<PublishChannel>.OUT)
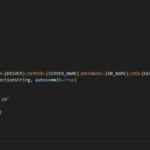
Save the record. Then go to Properties tab. Enter mapping as follows
To test the mapping works, create another SR. And check in Webhook to ensure it now receive a new message in JSON format
To receive JSON on Webservice, use similar step like above, the only key difference is, we have to name the JSON mapping as <ExtSys>.<EntService>.IN. And use a mapping like the example below
I want to post a simple JSON message to an external system and do not want to add any external library to Maximo as it would require a restart.
In the past, I used the Java HTTPClient library that comes with Maximo, but it would require half a page of boilerplate Jython code. Recently, I found a simpler solution below.
Step 1
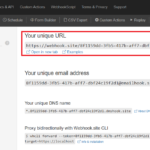
First I use WebHook as a mock service for testing. Go to webhook.site, it will give us a unique URL to send request to:
Step 2
Go to the End Point application in Maximo to create a HTTP Endpoint
End Point Name: ZZWEBHOOK
Handler: HTTP
Headers: Content-Type: application/json
URL: <copy/paste the Unique URL from webhook>
HttpMethod: POST
Step 3
To ensure it’s working, Use the Test button, write some simple text, then click on “TEST”. Maximo should show a successful result. In Webhook, it should also show a new request received. (Note: if it gives an error related to SSL, it’s because Websphere doesn’t trust the target website. You’ll need to add the certificate of the target website to Websphere trust store)
Step 4
To send a request, just need two lines of code as follows:
In Maximo, we can upload images as attachments (DOCLINKS) which are stored as files on the server or as “profile” images which are stored as binary data inside the IMAGELIB table. Profile image is quite useful to give the user a quick view of what an inventory item or an asset/location looks like.
While Maximo allows us to upload DOCLINKS attachments via the Maximo Integration Framework (MIF), uploading images to the IMAGELIB table via MIF is not supported out-of-the-box. Therefore, to upload images, we can only do it manually one by one via the Maximo UI.
For bulk loading, if we have access to the DB server, we can write a stored procedure to read the files and import binary data directly to the database. There are two scenarios I had in the past in which this approach doesn’t work
When we built mobile apps and wanted to upload data to IMAGELIB. In that case, my teammate extended a REST handler class to achieve this requirement.
When we needed to bulk upload images, the client did not give us access to the database
To address this requirement, we can extend the process classes of object structure (OS) to encode/decode binary data into Base64 string to deliver the data via XML or JSON format. Since this processing is done on object structure, it will support both application Import/Export and sending/receiving binary data via the integration framework’s MEAWEB API or JSON API.
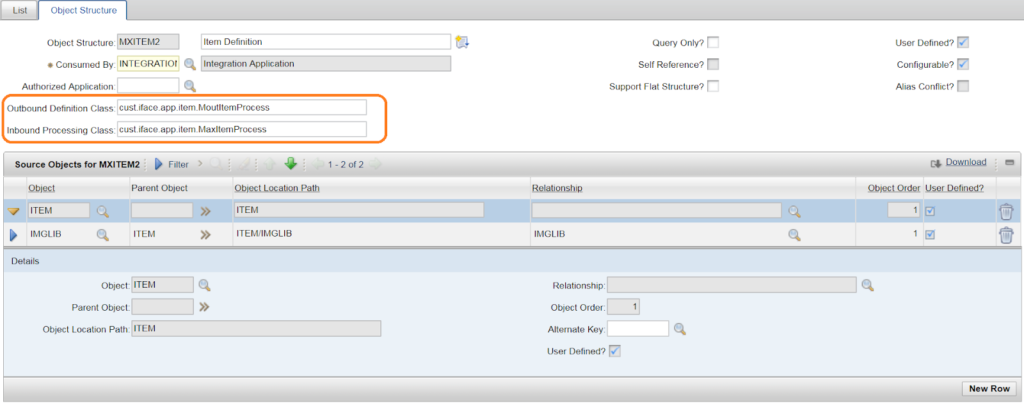
To encode binary data to Base64 text string before exporting OS data, we can extend MicSetOut.class and associate it to the OS by specifying the class’s path in the “Outbound Definition Class” field. Below is the sample Java code which exports Item master data with Image:
To decode base64 string back to binary data before storing it to IMAGELIB table, we can extend the MicSetIn.class and associate it to the OS by specifying the class’s path in the “Inbound Processing Class” field. Below is the sample Java code:
Once we have the customized classes in place, it is possible to Export/Import ImageLib data using XML format or via web services. It is also quite easy to write a simple Excel/VBA program to bulk upload images via MIF without the need to have direct access to the DB server. But these are different topics and perhaps, I’ll provide examples in other future posts.
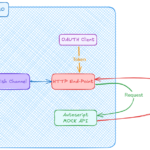
Recently I got some time to explore the new Federated MBO feature. I like it a lot because it is simple to configure and quite powerful. Of course, prior to Maximo 7.6, the same functionality can be done with Java programming, but with this new feature, it is so easy to incorporate data from external systems into Maximo business logic and make a seamless experience to the end-users.
Basically, Federated MBO allows you to link an API from an external system and make it looks like a standard object in Maximo and treat it like other standard Maximo objects such as displaying data on GUI or setting up workflow conditions or writing automation script against it. The key difference here is that data is not stored inside Maximo database but queried from the API on-the-fly when the object is accessed.
Use Cases
I can immediately think of several applications that are enabled by this feature:
Integrate with Data Historian/SCADA: to display real-time operation conditions of assets. It is always beneficial for the asset managers to know the current conditions of the assets when planning works. Traditionally, operation conditions of critical assets can be imported/synchronized into asset meters for conditional monitoring PM or analytical reports. But it is not real time data. Generally, we don’t import every meter reading collected into Maximo. It will fill-up the database and consume valuable system resource. With this capability, we will only query data of a specific asset or location directly from an external system and don’t store it in the DB. However, we still can interact with the data as part of Maximo functionality which is a distinct advantage over other methods such as embedding the web page of an external system inside Maximo or directing user to a different web application
Integrate with security access systems: to display in real-time the current whereabouts of a worker. This could help with work planning and coordination activities.
Integrate with external service: to verify ID, Certificates etc. for the labour self-registration process.
Integrate with weather service to assist work planning process. For example, Maximo will warn the planner when planning to work if extreme heat, high UV, or heavy rain is forecasted. This allows them to plan the work on a different date or prepare proper PPE equipment to the workers. The same can be done if we deploy sensors to report temperature, noise level, humidity etc. on certain work locations.
Implementation
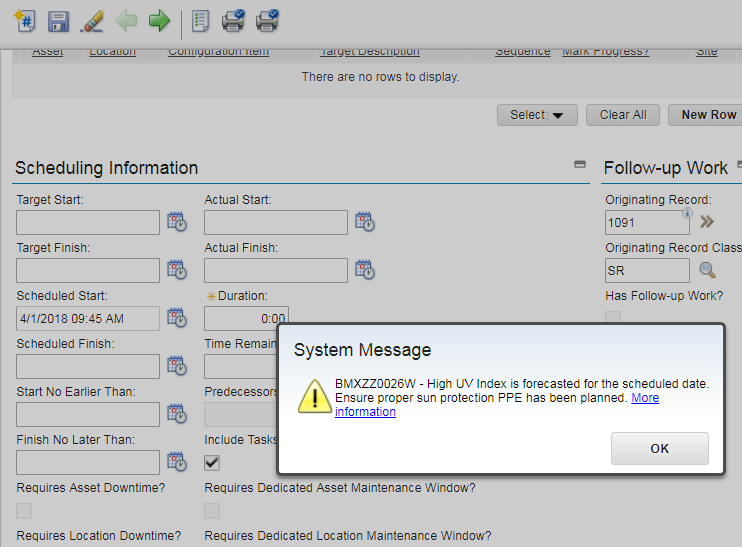
To demonstrate how the Federated MBO feature works, below is an exercise I did with OpenWeatherMap API. This API provides free access to 5-day weather forecast, UV Index forecast, and Air Pollution. In this example, I will link the UV Index forecast API and make it available as an MBO. When the user set a Scheduled Start Date, if UV Index is forecasted to be higher than 7, Maximo will display a warning message to remind the planner.
Step 1: Register OpenWeatherMap API account, and retrieve data on browser
Sign-in with your new account, go to Account home page, open the “API keys” tab and copy your API key to use it to access the API.
Paste the following link into a new browser tab, replace the XXX with your API key, you should be able to retrieve JSON data of the UV Index forecast for the next 8 days as shown in the image below
If you couldn’t retrieve the data, go to the site’s API document to read the instructions. It might have been updated. The OpenWeatherMap’s API syntax is very simple.
Step 2: Create a JSON Resource in Maximo
In Maximo, go to the Integration \ JSON Resource application. Under the More Actions menu, click Create JSON resource to start the wizard
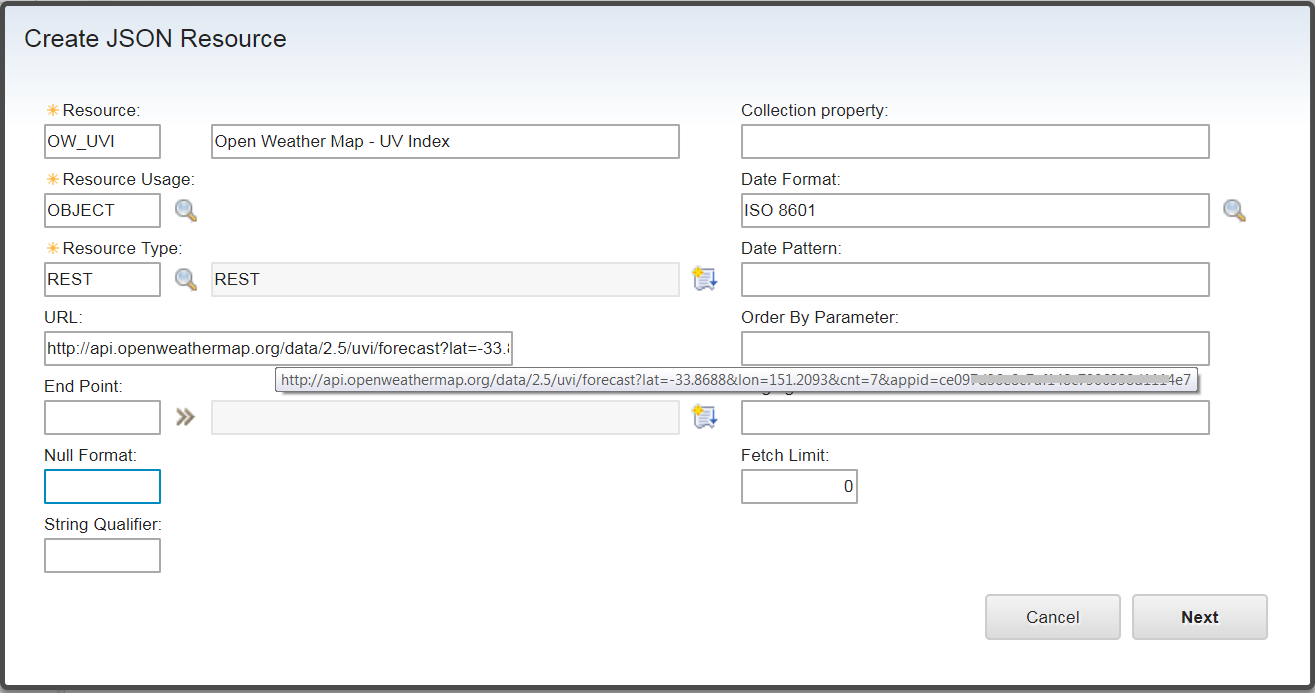
Create a new Resource
Resource: OW_UVI
Resource Usage: OBJECT
Resource Type: REST
URL: <copy/paste the URL in the previous step above>
Note: for simplicity, we hardcode the latitude/longitude of the location in the URL. Once it works, you can dynamically populate the values from the main object by putting the field name inside a bracket such as: lat={LOCATIONS.LATITUDE}&lon={LOCATIONS.LONGITUDE}
Click Next
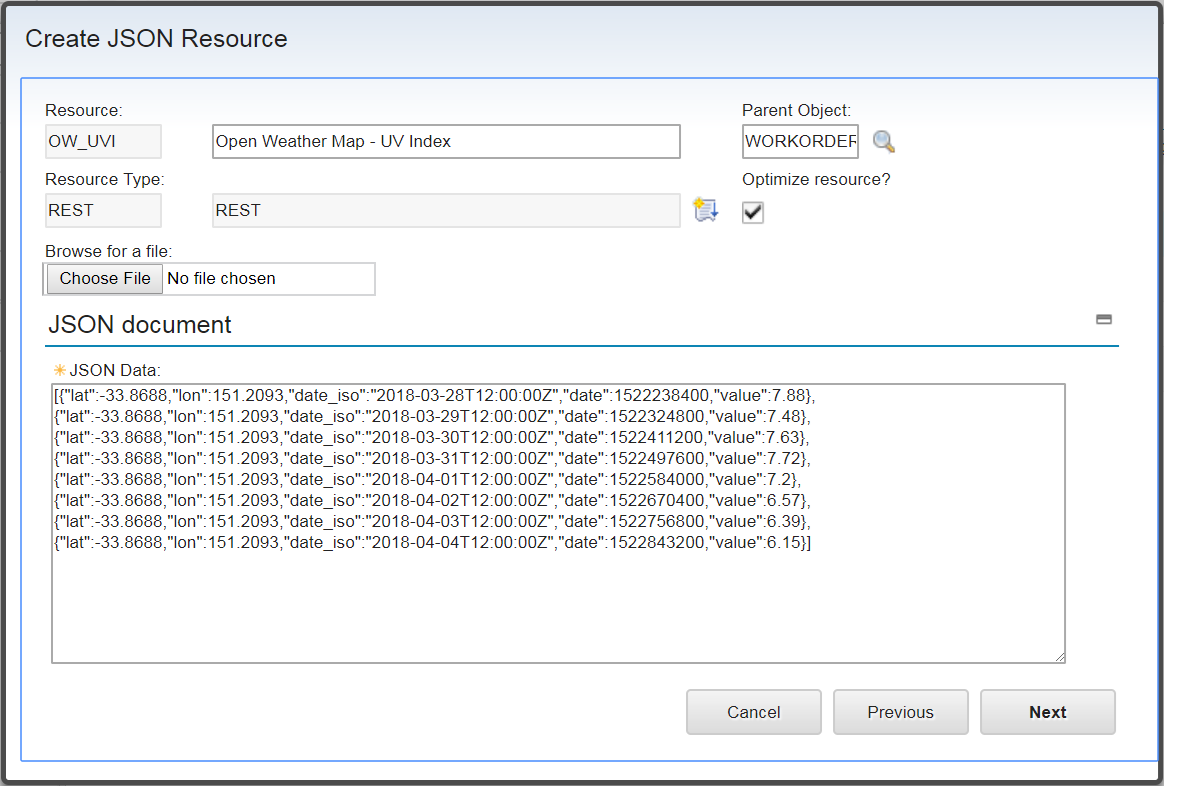
Copy/Paste the sample JSON data we retrieved in previous step from OpenWeatherMap into the JSON Data text area. This allows Maximo to parse the data structure returned from the API for the next step
For Parent Object, enter “WORKORDER”. This will create a relationship on the “WORKORDER” object to point to the new JSON object “OW_UVI” we are creating
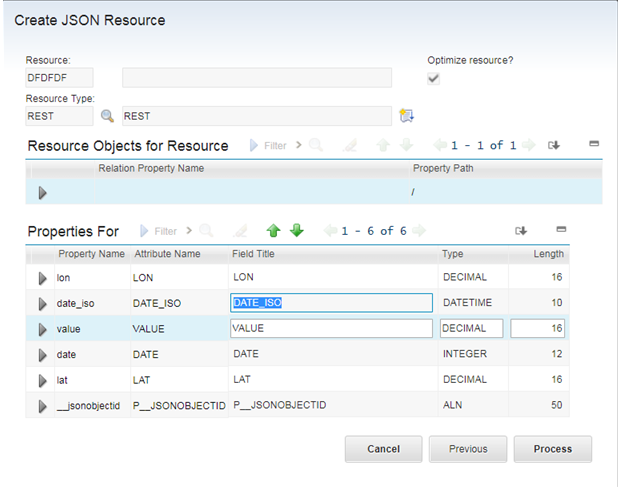
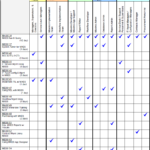
Click Next to proceed to the next screen. This screen summarizes how Maximo parsed and construct new MBO structure from the sample data provided.
Leave the default value, click Process to finish.
Step 3: Test the new JSON Resource
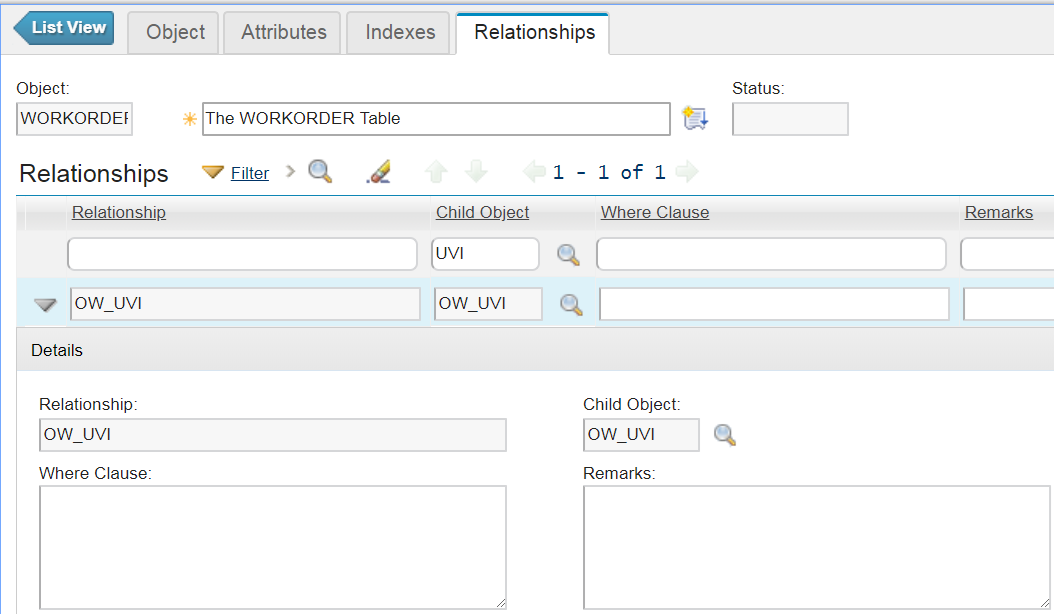
In the Database Configuration application, open the new OW_UVI object it just created for us. It also added a relationship OW_UVI in the WORKORDER object to link to this new mbo.
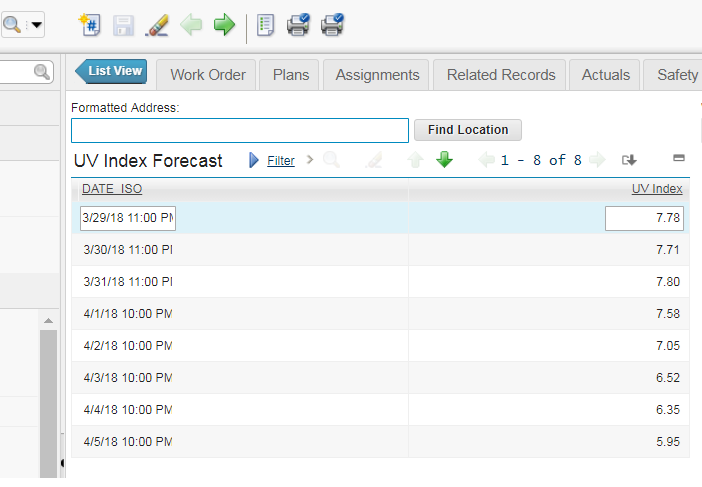
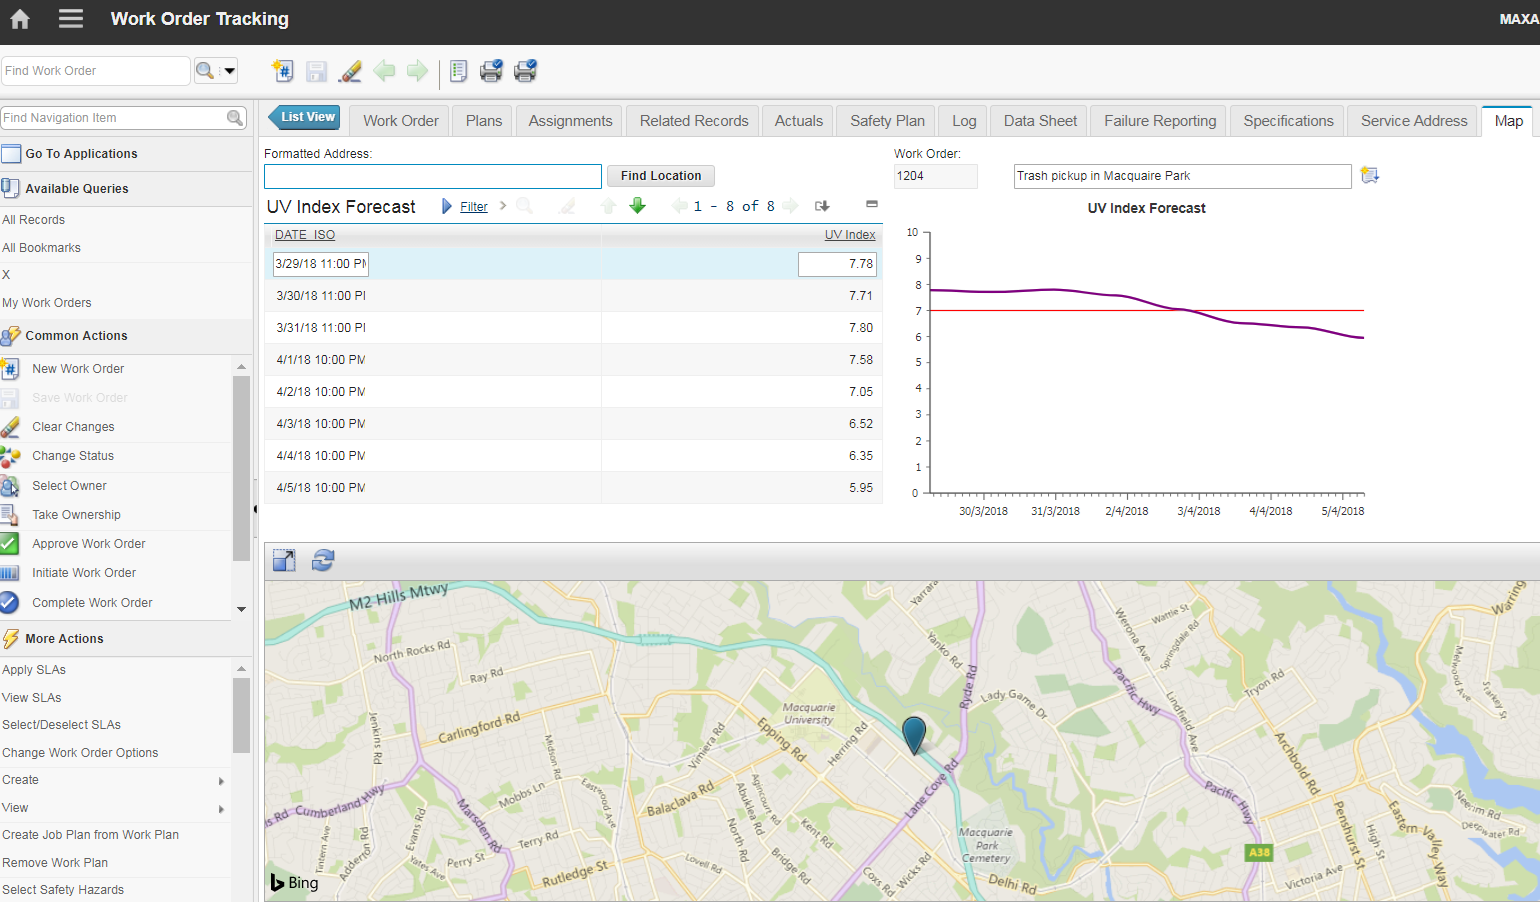
To check if our JSON resource can query data from the API correctly, use Application Designer, add a Table to anywhere, such as the “Map” tab. Open properties of the table, put OW_UVI as the relationship of the table. Add two columns and assign the DATE_ISO and VALUE field to the two columns.
Open the Work Order Tracking app, open any work order, the table will display some UV forecast data:
Step 4: Create a warning using Automation Script
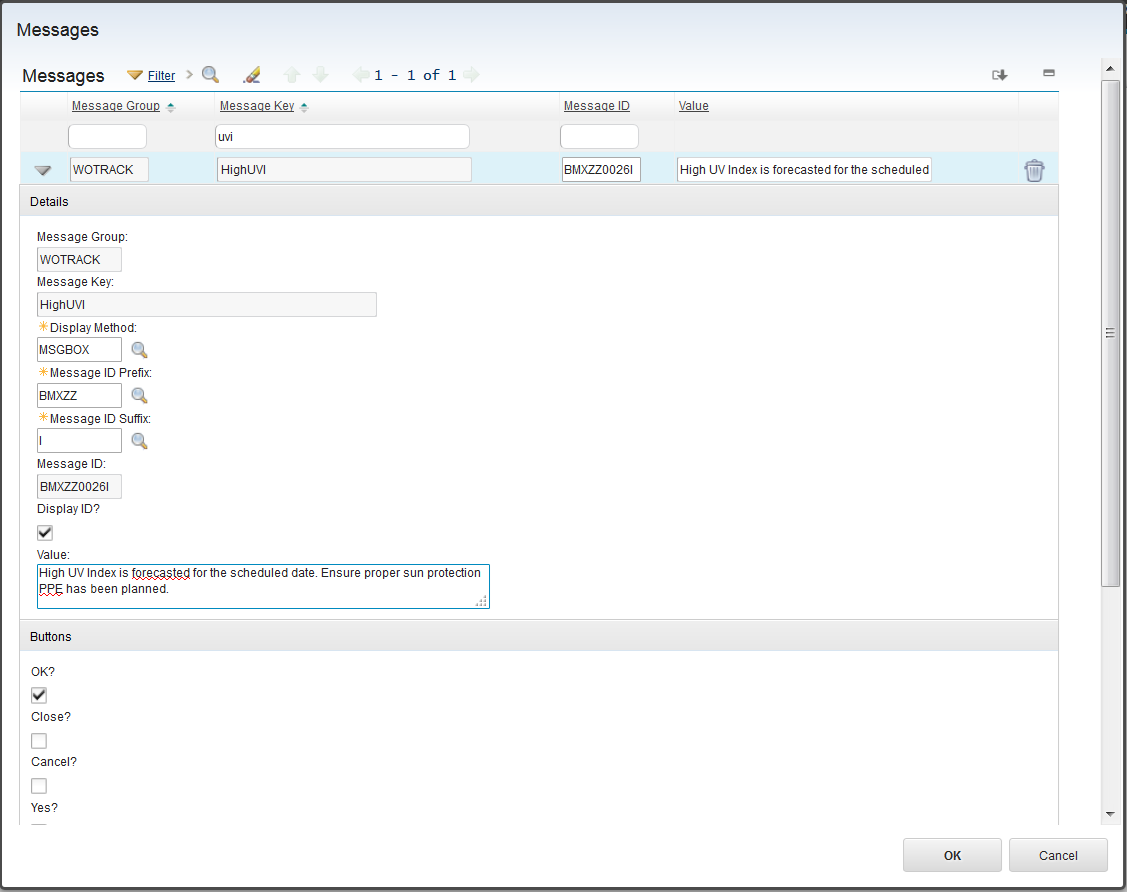
Open the Database Configuration app, choose Action > Messages to open the Message dialog. Create a new Warning Message:
Message Group: WOTRACK
Message Key: HighUVI
Value: High UV Index is forecasted for the scheduled date. Ensure proper sun protection PPE has been planned.
Note: the Message Group and Message Key fields are case-sensitive. Thus, in automation script, we should use the exact case in order for the message to be displayed
Open Automation Script app, Create an Attribute Launch Point:
Launch Point: SCHEDSTART
Object: WORKORDER
Attribute: SCHEDSTART
Event: Validate
Click Next to the next screen, give the script a name such as Check_UVI choose Python as language
Click Next. Copy/Paste the following source into the Source code text area, then click Create to finish creating the script
In this script, I compare and identify if the Scheduled Start Date is in the next 8 days, and if the UV Index is higher than 7. If this condition is met, Maximo will display the warning we created above.
Extras
With Maximo 7.6, we can setup to assign Service Address to Location with coordinate of the location. When a Work Order is created against a location, it will inherit the coordinate of the location. We can use it to fill into the parameter of the API request, and retrieve the actual forecast of the Work Order’s location. If you’ve read my previous post on creating custom chart control, we can also modify the app to display UV Index forecast in a chart for visualization. A planner after receiving the warning can then open the “Map” tab to see the location of the work, and see the UV Index forecast on a chart to determine what day is better to carry out the work.
I hope you have fun with this new Maximo feature. If you can think of any creative application using this feature to make Maximo better, please suggest by leaving me a comment. I would love to try it out
I am a freelance Maximo consultant based in Melbourne. If you enjoy reading my blog, please connect with me on LinkedIn to get updates on new posts. If you or your company need any professional assistance, please leave me a message, I'll call you back.