In the last exercise, we added new properties to a control, and by doing so, we have a better understanding that the properties of a control are defined inside the <property-list>…</property-list> XML element. We also know how properties are passed from the control level to its components.
If you have some experience with Application Designer, you must already know that we can dynamically modify the value of a property using Conditional UI. We can do the same with the custom properties that we recently added.
With the two properties: “part1size” and “part2size” added to the multipart
textbox in the previous exercise, let’s configure a simple Conditional UI to demonstrate this capability:
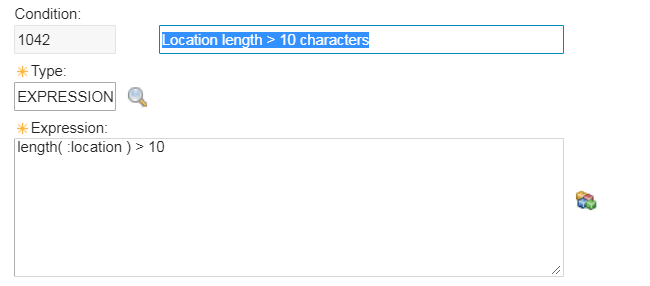
- Create a new condition using Condional Expression Manager
with following condition: length( :location ) > 10
- Use Application Designer to edit the Location application
- Select the Location multipart textbox under the “Main” tab. Right-click on it to open the Properties dialog of the control
- Go to the Advanced tab, then add READ to the Signature Option box.
- Click on the Configure Conditional Properties button to open the Conditional UI configuration dialog.
- In the Configure Conditional Properties, add Everyone security group, then specify the Condition we’ve just created in Conditional Express Manager. Under Property Values – Condition is true, enter two properties:
- Property: part1size – Value: 15
- Property: part2size – Value: 35
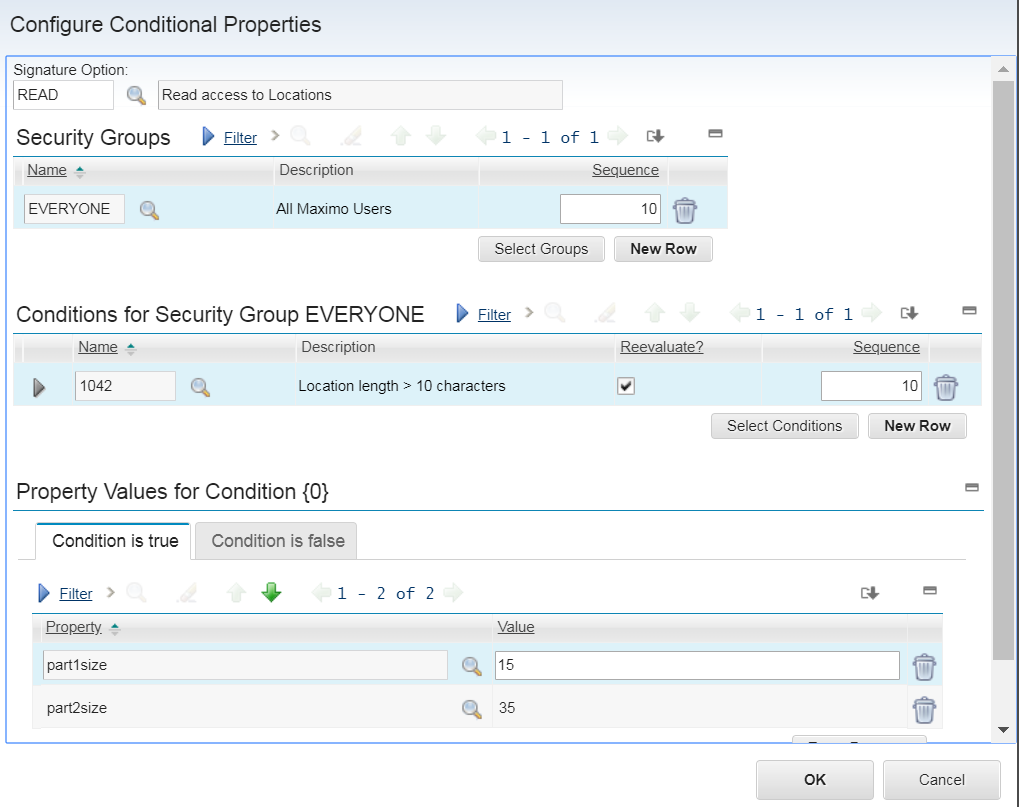
- By doing this, we tell Maximo to resize the two components of the Multipart Textbox when the Location field is longer than 10 characters.
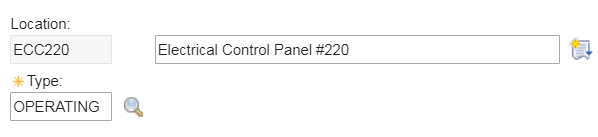
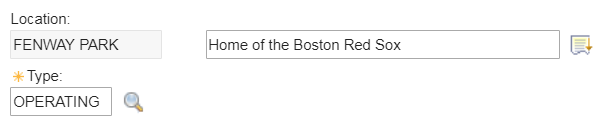
- Save the application configuration. Then open the Location application, find a location with the Location value shorter than 10 characters, and open it. You will see the multipart textbox looks normal. But if we open a location with the Location field longer than 10 characters, we will see that the multipart textbox is resized to be a bit longer.
The whole purpose of this exercise is to demonstrate that we can dynamically modify the appearance of Maximo applications by adding new properties to a control, and then modifying the value of the properties based on specific conditions.
In the next post, I’ll provide a more detailed example of how to pass property values from the component to the JSP file, and then apply some business
rules to Maximo UI controls using JSP and Javascript.
 – Control properties")
")


I have created a new control that I would like to add to the App Designer Control Palette and be able to drop it on the app client area. Then be able to edit the properties in the same way the standard Maximo control are done. Any information would be very much appreciated. Thanks, Rod.