Email or SMS Notification?
Occassionally, someone would ask me if we can configure Maximo to send notifications via SMS. With Maximo, the answer to such questions is always Yes. However, with this one, it will cost some money, very cheap though.
Since it is not free, I would say for most Maximo notification scenarios, the user would be ok with email notification which is free. However, there are certain scenarios where SMS notifications can add value such as:
- Notify a field worker when a new high priority Work Order is assigned to him/her
- Notify an asset owner when the asset deviates from the normal operating parameter range or when downtime is reported
- Notify Maximo admin when there are repeated login attempts from an uncommon IP address or when there is a major problem tracked by the Escalation app.
In the section below, I provide the detailed steps on how to set up a trial Twilio account and send notifications from Maximo
A. Setup a Twilio trial account
With your trial account, Twilio will give you a small initial balance to buy a phone number and use the service. I got $15, and it will cost me $6 to buy a phone number, and 5 cents to send a text message.
- Create a trial account on Twilio.com: you’ll have to use your real mobile phone number to verify the account.
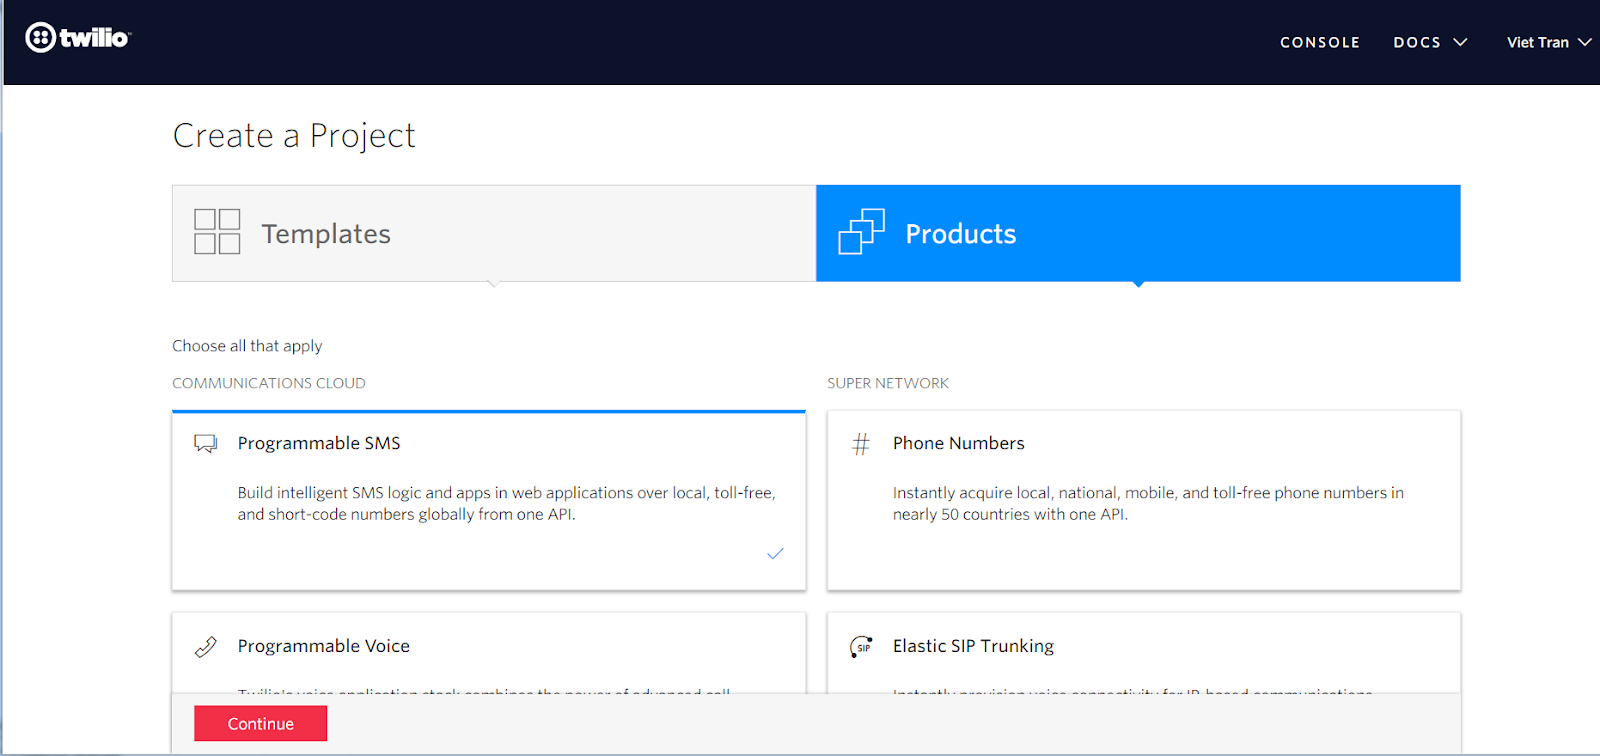
- Login using your trial account, go to Console, then create a new Project. Select “Products”, then choose “Programmable SMS”. Give your project a name, for example: “Maximo”. Then skip the rest of the steps to create the project
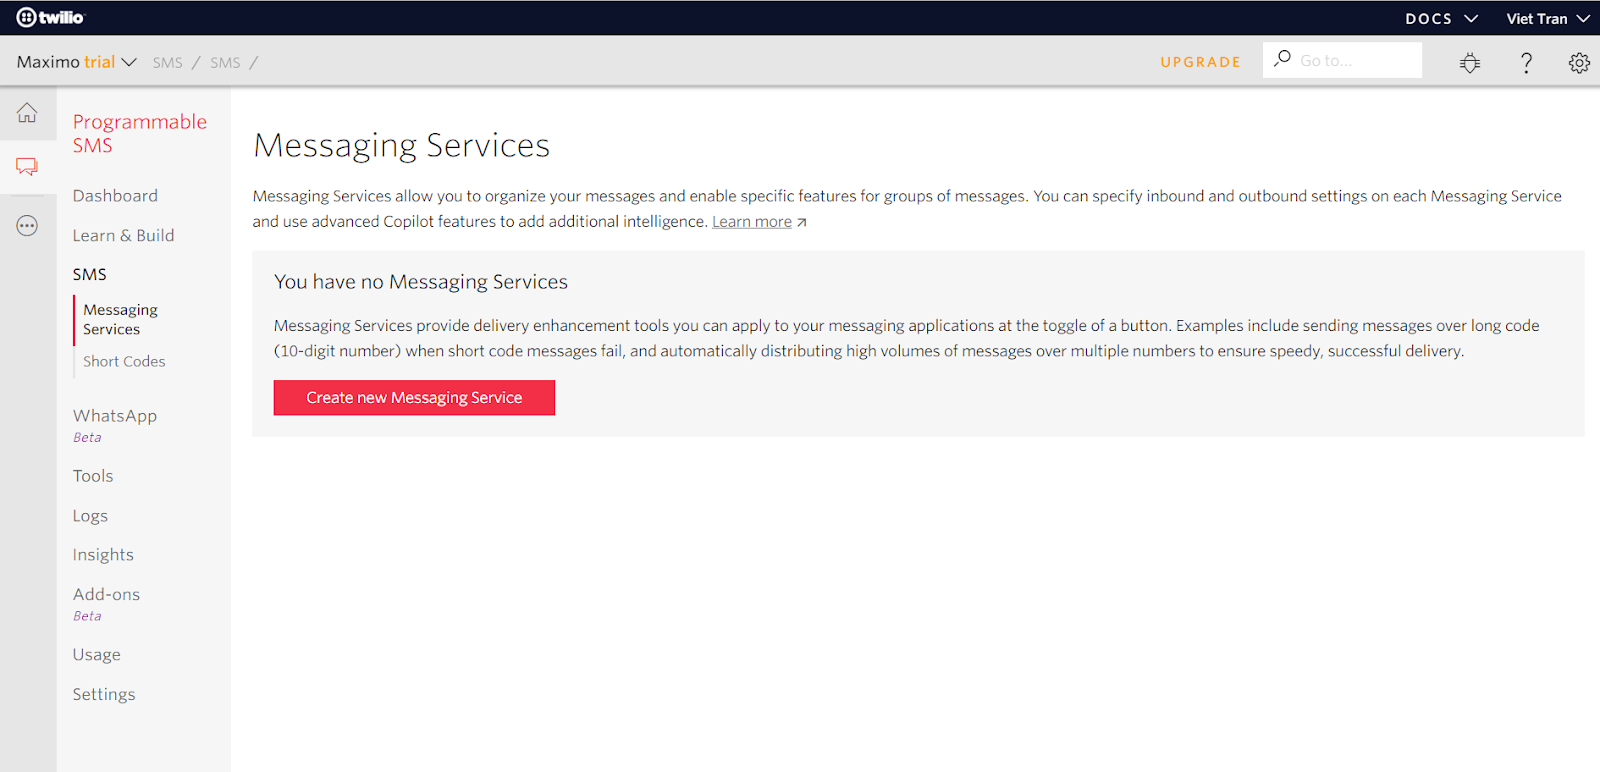
- On the left menu, click on the icon with the title “Programmable SMS”. In this menu, open the “SMS” submenu, open the “Messaging Services” page, then click on “Create new Messaging Service”
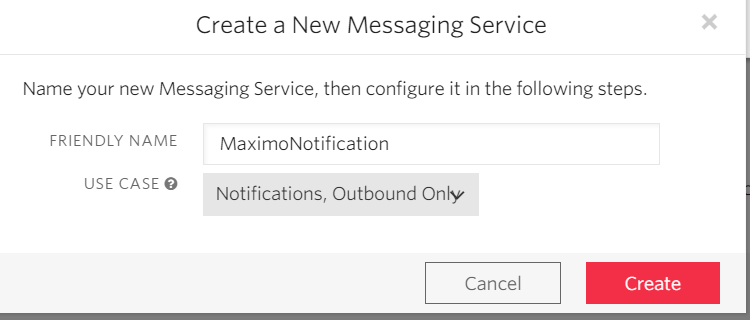
- Give the messaging service a name, such as “MaximoNotification”. For use case, choose “Notifications, Outbound Only”. Then click on Create
- After the messaging service is created, open it. On the left menu, click on Number to open it, then click on “Buy a Number” to purchase a telephone number. On the pop-up, select your country code, then click on “Search”. It will give you a list of numbers to choose from
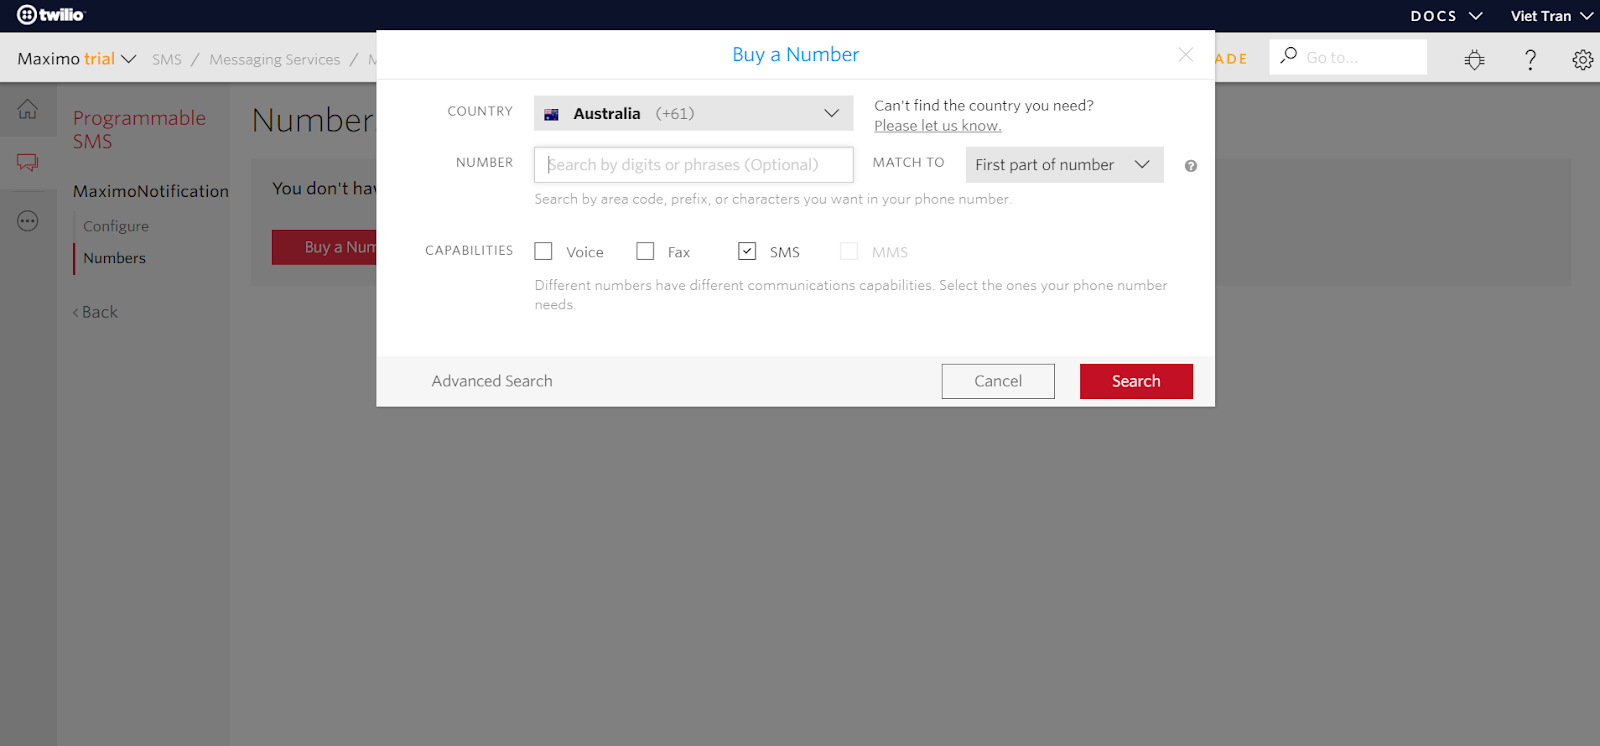
- Choose a number with SMS capability, and click on Buy. Depends on the country you live in, you may have to enter some details for your new number. I’m in Australia, so I have to enter my address.
- After purchasing a number, you are ready to send SMS messages from your Twilio account.
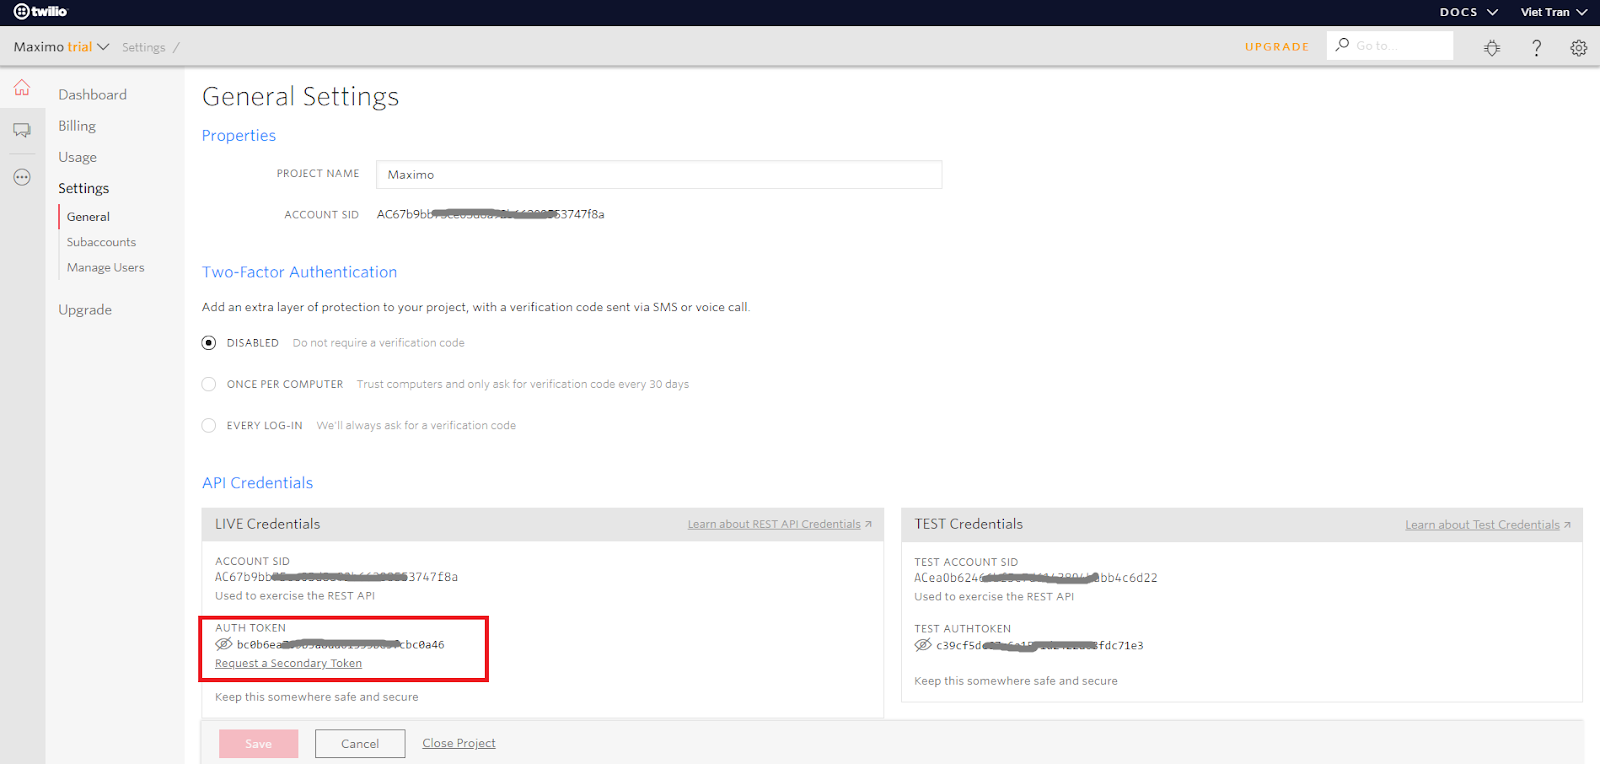
Please note: with Trial account, it can only send SMS messages to a Verified Number. Your mobile number which you entered when registering is automatically added to this list. So you will be able to send SMS to that number. But if you like to send SMS to a different number, you’ll have to add it to the ‘Verified Caller ID’ list first. - Go to “Console Dashboard”, open the “Settings” sub-menu, then open “General” page to take note of your Account SID, and Authentication Token. You will need it to send an SMS from Maximo.
B. Configure Maximo to send REST requests to Twilio
There are different ways to set this up depending on your requirement. In this example, I’ll create an ‘Action’ automation script, and send a REST request using Apache HTTPClient library. Action auto script can be used with Workflows or Escalation. In this example, I’ll send out an SMS when the workflow is initiated on the Service Request application.
The setup steps are as follows:
- Go to Automation Script application, create an ‘Action launch point’ automation script. Give the launch point a name, for example: “SENDSMS”. Set the action name as “SENDSMS” too. Set “SR” as the main object. Select “Jython” for script language. For the script, copy/paste the example code below to the “Source Code”
- With the code above, replace {YOUR_ACCOUNT_SID}, {YOUR_AUTH_TOKEN}, {YOUR_PURCHASED_PHONE_NUMBER} with actual details of your Twilio account. For testing purposes, replace {RECIPIENT_PHONE_NUMBER} with your phone number. Later on, once it works, you can replace it with a variable retrieved from your record using mbo.getString()
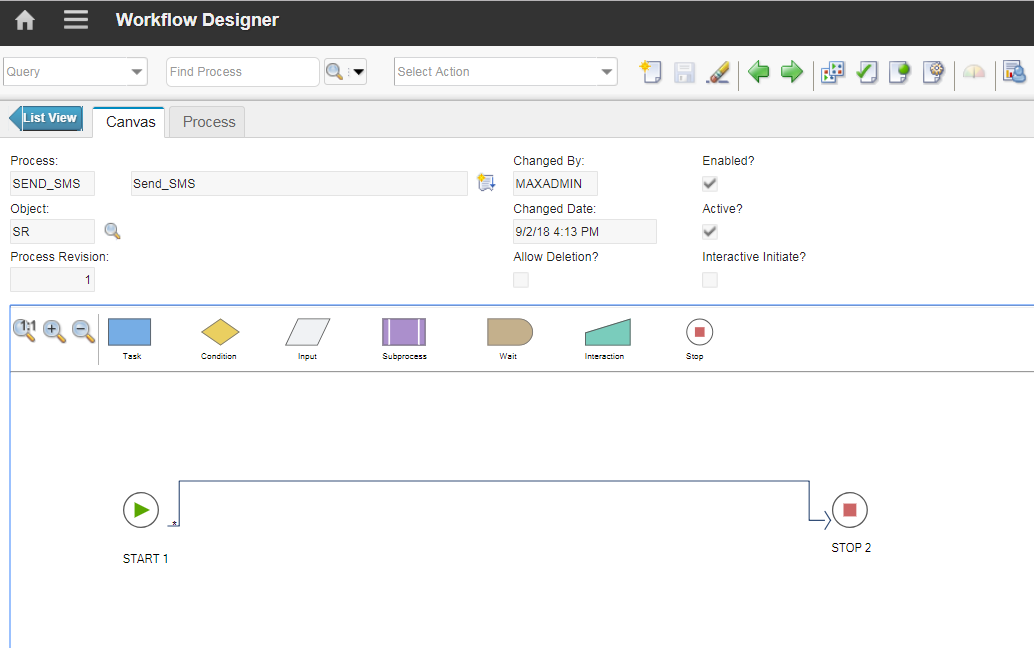
- Create a new workflow “SEND_SMS” for the SR object, connect the Start and Stop node with one line. And set the line to use ‘SENDSMS’ action. After that, Enable and Activate the Workflow. And remember to Add Workflow to SR application using the Select Action menu if you haven’t done so.
- Open an SR record, then click on the route button to initiate the “SEND_SMS” workflow
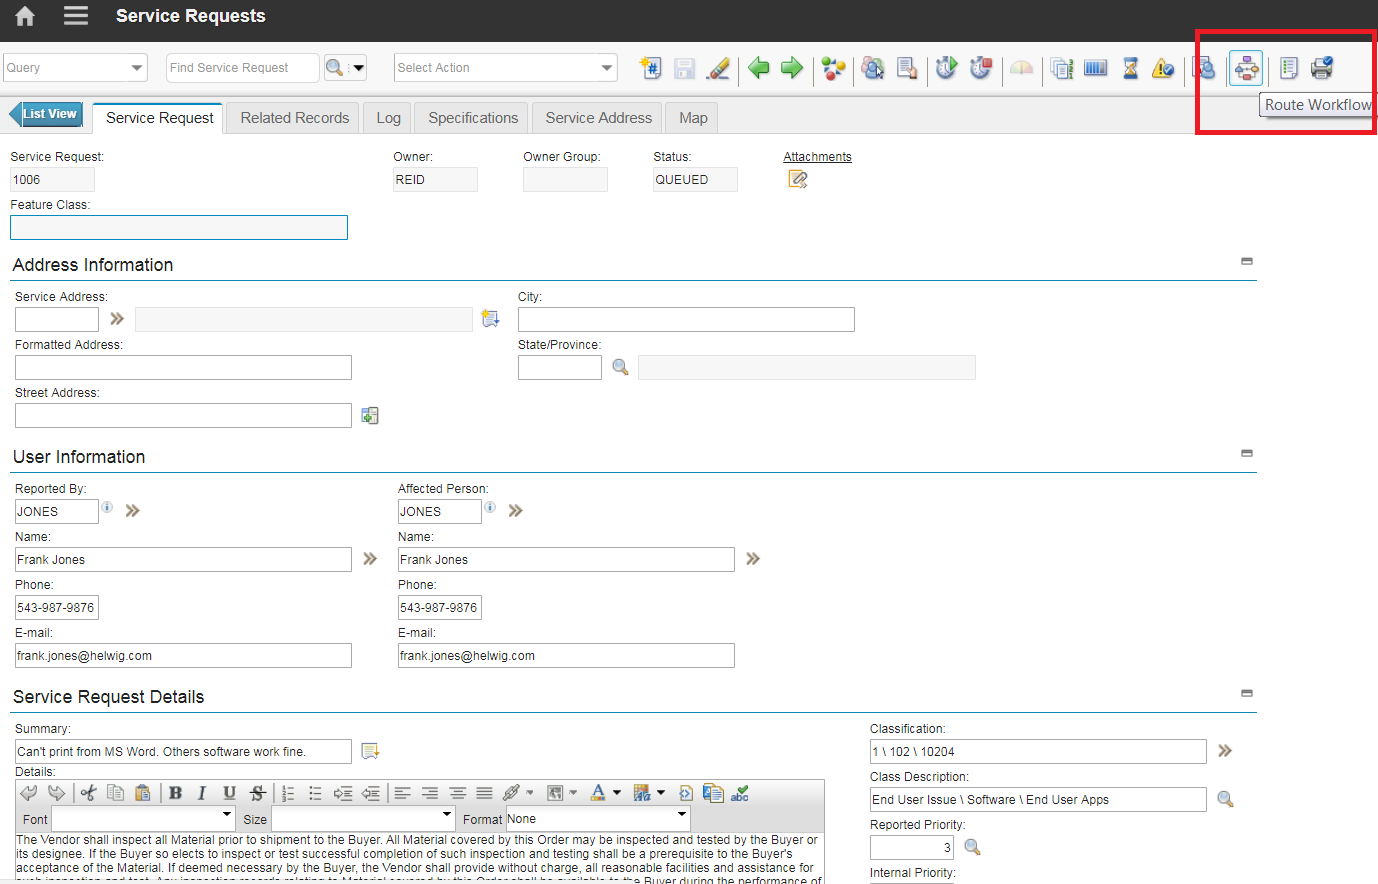
- After clicking on the Route workflow button, you should be able to receive an SMS message on your phone:

Source Code:
In a later post, I’ll talk about integrating Twilio with Maximo to create new Service Requests via SMS. For now, good luck with spamming your end-users with endless work requests 🙂


")
can you provide training how to enabled and create SR via sms with complete details
i am fresher for maximo there for i need more guidance
Hi Viet,
While I route the SR workflow, I receive the error:
"BMXAA4407E – A nested exception caused the workflow process to fail.
BMXAA7837E – An error occured that prevented the SENDSMS script for the SENDSMS launch point from running.
ImportError: No module named impl in script at line number 6"
Any idea on how to overcome this error?
Regards.
Sounds like you don’t have this library in Maximo: org.apache.http.impl.client. Could be because your Maximo version is different to the one I tested on (looks like 7.6 from the image). The whole script is essentially just to send. HTTP post request to Twillio. You can download that library Jar file and copy it to Maximo/application/maximo/lib folder, or search on stackoverflow to get a standard java library to do the same. I remember newer version of javascript or python in Autoscript can do it in just one or two lines of code. Try that as well. I don’t have a computer with me now, so can’t check.
Hi Unknown, Have you tried logging script from System Configuration -> Logging? What it say?.
I think that message could be some syntax error on script.
Regards
Hi Viet Tran
Am new to maximo i learn functional and some custom configuration in maximo watching your youtube channel only. i have a question how to send a custom mail(sender mail id should be mine and receiver should be mine how to do )
How do I integrate my SMS gateway with maximo
hi Viet
it show me this error
cannot import name HttpClientBuilder
please help
Hi,
I am getting this error while testing with maximo sr
BMXAA4407E – A nested exception caused the workflow process to fail.
java.lang.NoClassDefFoundError incompatible with java.lang.Exception
on line client = HttpClientBuilder.create().setDefaultCredentialsProvider(provider).build();
jar httpclient-4.5.13 is in lib
regards
Pingback: Interacting with Maximo via SMS with Twilio